Striped Glitter Tumbler with Printed Vinyl Tutorial
Share
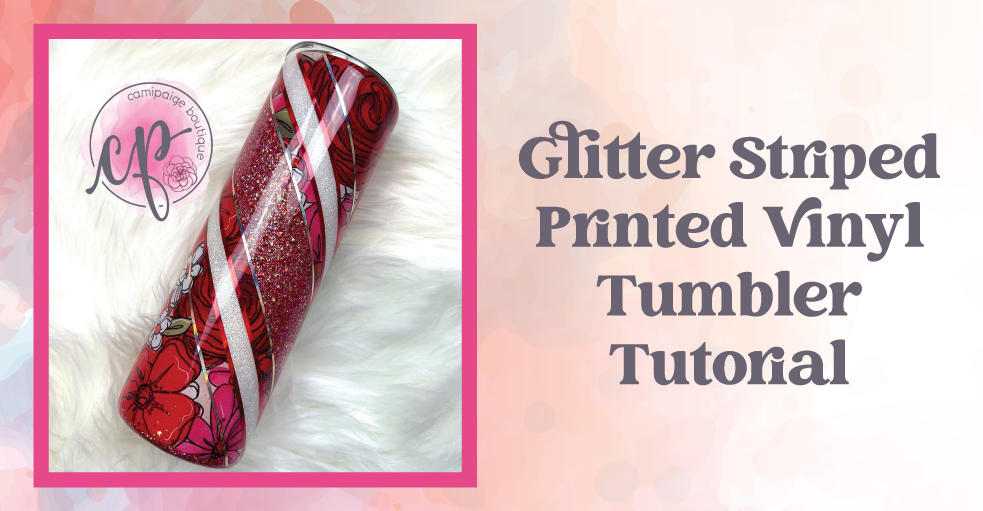
I had so much fun creating this tumbler and the design is so versatile that is can be used with so many printed vinyl designs and glitter colors. Here are the steps and materials I used to bring this beauty to life.
For this design, I started with a 30oz Straight, No-Taper Tumbler from AB Designs, Co. (You can find the one I used here: https://bit.ly/3SDOxpQ)
I prepared my vinyl (I purchased from Peachy Olive Glitter here: https://bit.ly/3eKOyIM) and trimmed the white edges off.
I peel back about an inch or two of the paper backing from the vinyl and trim it off.

Draw a straight line on the tumbler using the Ultimate Decal Guide and line the edge of the vinyl up with the straight line. Press down the sticky part of the vinyl where we had removed the backing, and wrap the vinyl around the cup to ensure that the vinyl is applied as straight as possible on the tumbler.
Once the vinyl is applied straight, lift the vinyl and have the paper's edge pointing away from the vinyl. Using a squeegee, gently start to push the vinyl onto the cup and remove the paper at the same time. Start in the middle of the cup and push out towards the ends. This prevents bubbles and allows the vinyl to go on smoothly.

Continue around the cup with the printed vinyl until you come to the end. Push the two seams down until you can see the line from the underneath vinyl. Grab your craft knife, and run it along the seam where you see the line underneath. If you are not confident in your straight line cutting abilities, cut the line about an 1/8th over on top of the vinyl underneath. This will prevent any of the stainless steel from showing.
Now we can use the vinyl trimmer to cut the vinyl off the top and bottom rim of the tumbler and get a perfect edge. Remove the access vinyl and then we can move on to the fun stuff.

Grab 1.5 inch tape and make a swirl around the cup and make sure the tape is laying flat on the tumbler. You want to swirl the tape so that both ends of the tape end in a straight line. Then grab .5 inch masking tape and lay down one stripe of tape on both sides of the painter's tape. In the tutorial I lay down all of the tape outlines, but this works better for keeping the glitter and paint in place.
Take your craft knife and run the blade down the seam between the two pieces of tape on both sides of the painter's tape. Then remove the painter's tape and the printed vinyl underneath. You should have a swirl of stainless steel with two pieces of .5 inch masking tape on both sides.
I then grabbed Heartthrob from Miss Lillian's and painted the stainless steel swirl. I let that dry and then apply a thin layer of Glitter Glue and then sprinkled a red glitter mix on top. One mix I really like is GNL from Peachy Olive Glitters. I let that dry for an hour, then I brush off excess glitter and spray seal it twice with Rust Oleum 2X Clear Gloss Spray Paint, waiting 45 minutes between coats. When the second coat of the clear spray paint is dry, get the .5 inch masking tape and put three strips of tape lined up right next to the glitter swirl.

After the tape is applied grab your craft knife and run it between the seams of the tape, pushing hard enough to cut the vinyl. When the is complete, pull the center stripe of tape and vinyl, leaving the other two pieces of tape. Paint the two exposed stripes white, do two coats and let them dry.
Once the paint is dry, apply a thin layer of glitter glue and apply Chantilly from Peachy Olive Glitters. Once you are happy with the coverage, immediately remove the tape and let it dry for one to two hours. Then brush off excess glitter then spray seal the glitter twice with the same spray paint listed above.
After the sealer is dry, do a thin coat of epoxy. I used between 15 - 20 mls and let the cup turn until it is dry.
Grab masking tape or painter's tape and mask off the bottom of the cup using the printed vinyl as a guide. Once applied, push down the tape to ensure minimal bleeding.
Using the same red paint that you used in the first swirl, and paint the bottom of the cup. Do 1 - 2 coats to get full coverage, apply a thin coat of glitter glue, then apply the same glitter mix from the center swirl. One the glitter is applied, immediately remove the tape and let it dry. You know the drill by now, but seal the glitter twice.

With all that done it is now time to pinstripe the tumbler. For this step, I use nail tape that I bought from Amazon. I use a thick silver piece of nail tape to outline the red glitter mix and red to outline the white swirls. Once I was done with the pin striping of the swirls, I grabbed .5 inch masking tape, and put it next to the white swirls and use it as a guide to put another silver line of pin striping. I push all of the nail tape down, then use a craft night to cut off any access.
Move the cup to the turner, and grab a poly sealer and apply it over the nail tape so it doesn't lift when you go into your coats of epoxy. Let the sealer dry for 45 minutes to an hour and move in with your final coats of epoxy.
Do 2 - 4 coats of 15 - 20 mls of epoxy until the cup is completely smooth and you're done!
Check out the full tutorial here:

